Best Ever {I Mean Ever} Banana Cupcakes

Hey guys.  Um, can we talk?  I’m seriously bursting with happiness about some changes that will be happening over here in the next few weeks.  First off, in just 10 days it will be 5 years since I started this little adventure, with hubs and camera in tow.  A lot has happened in 5 years!  We made some pretty amazing new friends.  Yup, for real, that’s you.  And we’ve had some pretty great experiences.   Remember when we were in the launch issue of Taste of Home Canada Magazine?  That was seriously a thrill for me.   Like, icing on top of the cake amazing.  The bee’s knee’s.  You know, pretty darn cool.   And those articles for Food Bloggers of Canada?  That’s us, feeling proud to be networking with our fellow Canadian foodies alike.  As well, just last year, I became a contributor over at Hello Creative Family.  And I love that group of creative people over there.  Gosh, guys, I’m so darn grateful.  Because slowly but surely, this blog is climbing up to where I dream it to be.  And I’m hoping you’ll come right along with me.

Best Ever Banana Cupcakes via SweetRevelations


Oddly enough, the very first post ever was called New Beginnings, which is just where we’re headed.   Pretty soon, this sweet little blog of mine, will have a whole new look.  I just can’t even tell you how excited I am.  No seriously, the designer I’m working with will probably want to strangle me when all is said and done.  This blog has been my pride and joy for 5 years, so moving things around and doing a makeover is kind of overwhelming and scary.

Oh, don’t worry, desserts and sweets will still be a huge part of my blog, because frankly, this world needs a whole lot more cake.  But I’m also really excited to share other things about myself and my family too.  We live on a postage stamp sized lot, in the middle of a bustling city, but are working to shift to a more sustainable living.  We’re growing things, and upcycling things, supporting local farmers, and just generally trying to live a little more you know, soulfully.  I’ll be writing and posting about some of these idea’s along the way.

Best Ever Banana Cupcakes via SweetRevelations


I’m thinking and hoping that this might be the last post, before the big reveal.  I thought it fitting to share one of my most pinned and viewed recipes, ever, in the last 5 years.   This time though, I’ve made it in cupcake form.  When I had the bake shop, I made hundreds of these Banana Cupcakes for weddings, showers and special events.  They’re super moist, full of that banana flavor that you love, and pretty simple and elegant.  Leave them un-iced for a quick snack too.  There is always a batch in my freezer, so the kiddos can grab a quick snack on their way out the door.

Best Ever Banana Cupcakes via SweetRevelations

So, I guess this is it huh?  Is this where we stand at the door, awkwardly twiddling our fingers, hoping to see each other again soon?  It might be quiet here for a week or two, but when I come back, I promise I’ll be all dolled up.  Have I told you yet HOW EXCITED I AM?!

See you soon friends,

Renee

Best Ever Banana Cupcakes

yield 24 – 30 cupcakes

  • 1 ½ cups bananas , mashed (about 3)
  • 2 teaspoons lemon juice
  • 3 cups all-purpose flour
  • 1 ½ teaspoons baking soda
  • ¼ teaspoon salt
  • generous pinch of freshly grated nutmeg
  • ¾ cup oil
  • 2 cups sugar
  • 3 large eggs, room temperature
  • 2 teaspoons vanilla
  • 1 ½ cups buttermilk, room temperature

Cream Cheese Frosting:

  • 250 gr. cream cheese at room temperature
  • 1/4 cup unsalted butter, room temperature
  • 1/4 cup Crisco
  • 6 cups powdered sugar
  • 1/4 tsp salt

Preheat oven to 350°.  Prepare 3 cupcake trays with 30 liners total.

1.  In a small bowl, mix mashed banana with the lemon juice; set aside.  In a medium bowl, mix flour, baking soda , nutmeg and salt; set aside.
2.  In a large bowl, mix oil and sugar until well combined.  Beat in eggs, one at a time, then add in vanilla.
3.  On low, add the flour mixture alternately with the buttermilk.  Stir in banana mixture.
4.  Pour batter into prepared liners, no more than 1/4 cup per liner, and bake in preheated oven for 20 minutes.  Place cupcakes on wire racks and cool completely.
5.  While the cupcakes cool, make the icing by beating the cream cheese, Crisco and butter in a large bowl.  Beat until smooth and well combined.  Add salt.  Add the icing sugar slowly and mix well to remove any lumps.  Fill a piping bag (with a 1M tip), and ice using a circular motion to create the rose effect.  Cupcakes can be stored in the refrigerator and brought to room temperature before serving.  You may have extra frosting left over, which is delicious on homemade cinnamon buns!
*recipe adapted from Food.com


7 Comments

Filed under Cake, Cup Cakes, Fondant and Icing

Apple Pie Dessert Panini with Salted Caramel

A few week-ends ago I borrowed a Panini press to experiment a little.  I’ve had some good café lunches and wanted to try some of these recipes at home.  As a result, we Panini-d our way through the entire week-end and this Apple Pie Dessert Panini with Salted Caramel was born.

Apple Pie Panini1

I don’t have very many kitchen appliances and I don’t follow too many food fads and now I know why.  I become slightly obsessed with a new toy or idea, and I make a ridiculous amount of food with it for a while.  Remember the cupcake craze?  I didn’t just make cupcakes for every acquaintance I knew, I opened a cupcake shop and made thousands!  That cupcake craze nearly did me in.  And when I bought our first deep fryer?  This place smelled like a fish and chip shop for weeks.   Our arteries are still recovering.  So yup, when I borrowed that Panini press, I dashed to the grocery store and bought all kinds of breads, meats and cheeses and melt-y things to put inside.  I became a bit of a freak about it, grilling something, and then wiping it down and trying something new.   I’m not kidding when I say, I made something in it for every meal.  As you know, I have teenagers, so when I started making grilled sandwiches again for dinner, a lot of eye rolling ensued.  It was getting to be time to back away from that Panini press, before I started planning my next sandwich shop.  I’m not even kidding.

But I lured those teenagers back with dessert (I’ll take any small victory with my teens at this point)!  I presented them with some golden raisin bread, oozing with brown sugar cream cheese, cinnamon sugar and apple slices.  I topped it with a generous scoop of vanilla ice cream and salted caramel sauce while still warm.  All melt-y and sweet and gooey, this Panini dessert was a real winner.  It was a fitting end to a week-end of Panini’s, and a super quick dessert to throw together.

Apple Pie Dessert Panini via SweetRevelations

Just to prove to you how over the top I can be, we ate this insanely good treat, and then I packed the press up to return it to its rightful owner.  I had to get it out of here, before the next days meals rolled around.  But not before I made a batch of homemade cherry pie filling, and showed up at their door with a bag of fresh egg bread, and ice cream.  Then I proceeded to invade their kitchen and make dessert Panini’s for them.

True story.

Salted Caramel via SweetRevelations

Happy week-end everyone!

Apple Pie Dessert Panini with Salted Caramel

  • 2 raisin bread slices
  • butter to spread on bread
  • 2 tbsp. brown sugar cream cheese (store-bought)
  • very thinly sliced apple (you will only use 1/4 of it)
  • cinnamon sugar (mix 1/4 tsp cinnamon with tsp sugar)
  • vanilla ice cream

Salted Caramel Sauce

  • 1 cup sugar
  • 1/4 cup water
  • 3/4 cup heavy cream
  • 3 1/2 tbsp unsalted butter
  • 1 tsp sea salt
  1. Make the salted caramel sauce first.   You will have leftovers, so cut the recipe in half if you need to.  But seriously, why would you?  In a medium saucepan, combine the sugar and water over medium-low heat and stir until the sugar dissolves.  Increase the heat to medium- high and bring to a boil, without stirring.  Use a wet pastry brush to wash down any sugar crystals on the side of the pan if you need to.  Boil until the syrup is a deep amber color, about 7 minutes.   Remove mixture from the heat and very carefully whisk in the heavy cream. The mixture will bubble a lot but keep mixing. Stir in the unsalted butter, and salt. Bring back to the stove on low heat and stir until you have a smooth sauce.  Allow the caramel to cool.   The salted caramel sauce will keep in the refrigerator up to 2 weeks.
  2. While the Panini press is heating up, butter one side of each slice of raisin bread.   Flip the bread over, so the buttered sides are on the bottom.  Spread the cream cheese on one piece of bread.  Layer some apples slices on top of that.  Sprinkle the apples with the cinnamon sugar, and top with the last piece of bread, buttered side out.  Place on the press and grill for 3-4 minutes, until the bread is golden and crispy.  Remove, slice the sandwich in half and top with vanilla ice cream and salted caramel sauce.


Leave a comment

Filed under Ice Cream, Sauces and Syrups, Scones and Breads

Honey Glazed Fig and Date Breakfast Cake

I am not a morning person.  I need a few quiet moments (more like 60 quiet moments) to myself, with a steaming cup of coffee, to clear out the cob webs and figure out how I’m going to tackle the day.  I trudge to the kitchen, in the darkness, one eye open, hair all askew, heading directly for the coffee maker.  Even the dog knows it’s best not to approach.  Truly, I admit it, I’m an ogre.   On the flip side, if you want to stay up all night and party like it’s 1999, I’m most certainly your gal.

Fig and Date Breakfast Cake via SweetRevelations

Weekends thankfully, are different.  I can wake on my own time and head to the kitchen to make something a little more decadent for everyone.   Often it’s buttermilk pancakes, scones or cinnamon rolls, sometimes fresh doughnuts (the best!).  Sometimes, it’s cake!  Like this super moist, cardamom spiced cake, topped with fresh figs, fresh dates, sliced almonds, pepita’s and a sprinkle of toasted coconut.  Just to make it more indulgent, I poke holes in it when it comes out of the oven and pour a sweet honey glaze on top.  This is how I redeem myself for my grumpiness from Monday to Friday.  Glazed breakfast items.  Works every time.

Fig and Date Breakfast Cake via SweetRevelations

This is a brunch worthy, company worthy, breakfast cake.  The cake itself is very fast and simple to throw together.  It’s also pretty versatile, so you can play around with your toppings and spices and add what appeals to you.  A simple dusting of powdered sugar works too, if you want to exclude the honey glaze.  But seriously, why would you?  I mean truly, honey glaze should never be excluded.

I’m curious to know, are you a morning person or a night owl like me?

Happy week-end everyone,

Renee

xo

Honey Glazed Fresh Fig and Date Breakfast Cake

*adapted from Joy The Baker

  • 2 1/2 cups all-purpose flour
  • 2 teaspoons baking powder
  • 1/2 teaspoon baking soda
  • 1/2 teaspoon salt
  • 1/4 teaspoon ground cardamom
  • 1/2 cup granulated sugar
  • 2 large eggs
  • 1 1/2 cups buttermilk
  • 1/4 cup unsalted butter, melted
  • 1 teaspoon pure vanilla extract
  • 1/2 teaspoon pure almond extract
  • 8 fresh figs, sliced in half
  • 3-4 fresh dates, pitted and chopped
  • 2 tbsp. pepitas
  • 2 tbsp. coconut flakes
  • 1/4 cup sliced almonds
  • 1-2 tablespoons turbinado sugar for topping
  • 1 1/2 cups powdered sugar
  • 2 tbsp. liquid honey
  • 2 tbsp. hot water

Preheat oven to 375 degrees F.  Butter and flour a 10-inch cast iron skillet or a 10-inch cake pan.

  1. Whisk together flour, baking powder, baking soda, salt, cardamom, and sugar in a medium bowl and set aside.  In a small bowl, whisk together buttermilk, eggs, butter and vanilla and almond extract.  Add the buttermilk mixture all at once to the dry ingredients.  Stir until just combined, careful not to over mix.
  2. Spoon batter into the prepared pan.  Top batter with fresh figs and dates, gently pressing them into the top of the batter.  Sprinkle with sliced almonds, pepitas and coconut  and then sprinkle the top with turbinado sugar.
  3. Bake for approx. 30 minutes, or until a skewer inserted in the center of the cake comes out clean.  Allow the cake to cool slightly while you prepare the glaze (keep it in the pan).  Whisk the powdered sugar and honey in a small bowl, adding 1-2 tbsp. of hot water to make a smooth, thin glaze.  Using a skewer, poke holes in the cake, to allow the glaze to seep through.  Pour the glaze over the warm cake.  Allow the cake to come to room temperature before serving.  The cake will keep well for a few days at room temperature.

10 Comments

Filed under Breakfast, Cake

Cherry Crisp Ice Cream {No Churn}

Spring is here my friends!  Spring is here!  We’ve had some gloriously warm and sunny days, and I must admit, with that comes some serious spring fever for me.  I’ve collected all of our lawn furniture out of hiding, we’ve given the dog a spring haircut, and yesterday I vacuumed and cleaned 6 months of hockey season out of my van (unfortunately, with two athletic boys playing for various teams that smell never truly leaves the van, ugh).  Oh, I do know that Mother Nature isn’t done with us yet, and next week I could be shoveling again.

But for now, I’m delusional enough to think spring has arrived and with that comes ice cream!

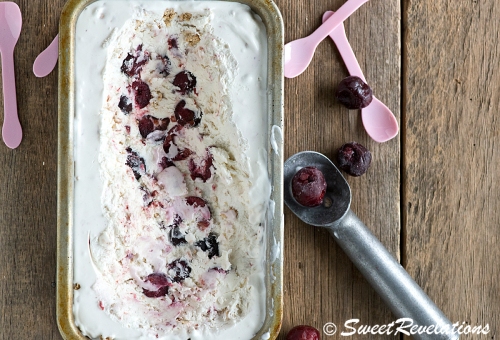
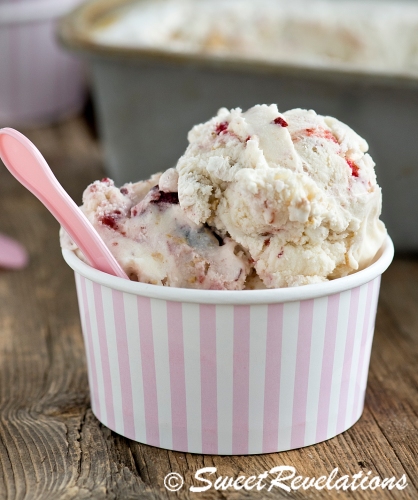
Cherry Crisp Ice Cream via SweetRevelations

We aren’t fair weather ice cream eaters actually.  The kids enjoy it so much that I have to hide tubs of ice cream in the deep freeze all year-long.  Sometimes I think I’ve done a great hiding job, only to find the tub completely empty with a spoon inside (yes still in the freezer as if it hasn’t been touched).  When I stomp upstairs, with my “are you kidding me?!” rant, no one says a word.  I know exactly who the culprit is, a tall and lean teenage boy with super blue eyes and a killer smile.  I’ve yet to catch him doing this, but I know it’s him.   And he knows I know it’s him. It’s just a vicious ice cream hiding circle around here.

I do have an ice cream maker, but I love no churn ice cream, simply because it’s fast and pretty easy.   I can toss in whatever fruit or goodies I might have on hand and throw it in the freezer for a few hours.  Usually, when I whip up a batch I spread it in a loaf pan and freeze it that way.  I find it’s an ideal size, and just enough for a family dinner with a little bit left over.

Cherry Crisp Ice Cream via SweetRevelations

This has to be one of my favourite combinations.  I love dark sweet cherries and cherry crisp is a top pick dessert wise for me.  I can whip up this ice cream in minutes and add the components of one of my most loved desserts to the ice cream without actually having to make it.  My secret?  To get morsels of a sweet oat-y topping, that won’t go mushy in the ice cream, I add some granola cereal to the mixture.  Genius right?  I still get the oat clusters, and almonds that I would add to my cherry crisp anyway, without all of the work!   It’s also a breeze to change the flavor by switching up the ingredients, like sautéed apples, or wild blueberries.

Cherry Crisp Ice Cream via SweetRevelations

For now, I guess we’ll keep doing the ice cream hiding dance around here.  I know that soon there will be a time where I’ll look back on these antics and wish for a teenager to be stealing sweet things from me again.

Happy spring friends,

Renee

Cherry Crisp Ice Cream

  • 2 cups heavy whipping cream
  • 1 can sweetened condensed milk, 300 ml size
  • 1 1/2 tsp almond extract
  • 1 3/4 cups dark sweet cherries, cut in half
  • 3/4 cup granola cereal, I used Harvest Crunch
  1.  Whip up the cream until soft peaks form.  Add in the sweetened condensed milk and almond extract and mix well.  Stir in the cherries and granola.
  2. Spread mixture into a loaf pan or freezer safe container.  Cover and freeze until firm 4-6 hours.


17 Comments

Filed under Ice Cream

Ugly Maple Syrup Pie

Well guys, I’ve gone from a post here about Bright and Beautiful Recipes To Make Us Happy, to pie.  Ugly pie at that.  I’ve tortured myself over this pie post.  In fact, I was so mad at the filling for cracking and the pastry for shrinking, that I left the pie to sit for two days.  Uneaten for two whole days!  After which, I seriously got ahold of myself, and realized that this world has far bigger problems than an ugly pie.

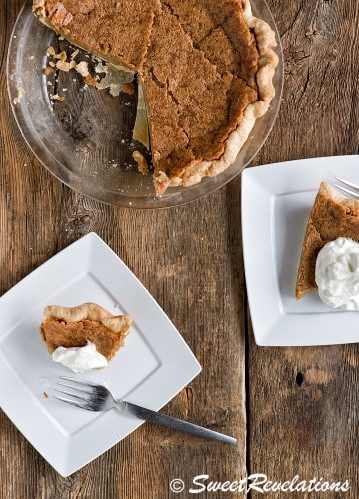
Maple Syrup Pie via SweetRevelations

And guess what?  I make mistakes too.  And this blog is a great place to learn about them.  And from them.  I bet Ree, Nigella, and Ina have had a whole mess of ugly pies.  That doesn’t mean we’re idiots, it just means that in the kitchen, we’re…well…we’re human!

So here it is….my Ugly Maple Syrup Pie.  And friends I have to say, that this was a pretty tasty ugly pie.  The cracking and shrinking didn’t compromise the taste one bit.  As a matter of fact, I was slightly miffed at myself because we let it sit so long, because we love Maple Syrup Pie!   I seriously can’t make up my mind.  I’m mad at the pie, then I’m happy with the pie.  What gives?!

Maple Syrup Pie via SweetRevelations

I’ve written posts, like this one here, on making the perfect pastry.  And when I had the bake shop, my mom was chief pastry maker, because she’s seriously good at it.  It’s golden and tender and oh so flaky.  I’ve also made more pie fillings, than I can shake a stick at.  But some days, I’m just a complete distracted mess in the kitchen, and things don’t turn out picture perfect.  Oh man, I’ve had some doozies.  It happens to all of us.

Maple Syrup Pie via SweetRevelations

Case in point, the ugly pie.  I think I’m doing a public service here really, as I tell you and show you all of the things you shouldn’t be doing with a custard pie.  First off, you should chill the pastry well before baking.  You shouldn’t take pictures of your gorgeous pie crust, as I did here, until the pastry is nice and warm for your #PiDay2016 Instagram photo.  And then, don’t overbake that sweet Maple Syrup custard.  Because if it poofs up like a soufflé, well, you’ve gone too far.

And you’re well on your way to ugly pie.

Maple Syrup Pie via SweetRevelations

Now if mom was here, she would tell me not to fret.  “There’s nothing better than a scratch baked pie!” she always said.  Even in the bake shop, as I worried over fillings that may have oozed slightly, mom would assure me that people were going to be thrilled with their authentic, homemade pie.  And she was right.

So, ugly and all, I’m going to share my recipe for this sweet Maple Syrup Pie, using local Maple Syrup, that is the essence of spring around here when the maple sap is flowing.   It’s a custard pie with pure dark Maple Syrup, brown sugar and butter, that will satisfy any sweet tooth.  It’s a springtime favourite!  Our family all agree’s that the side of unsweetened whipped cream is essential with this dessert, to balance out the sweetness in the pie.

I hope you make this.  Because if you simply pay a little more attention than me, you’ll see how locally produced sweet Maple Syrup can bake into a beautiful, rich and smooth, sweet treat.

Just because I’m nosy and it would make me feel better, I would love to hear about your kitchen disasters in the comments below!

Happy Pie Baking friends,

Renee

xo


Maple Syrup Pie

  • unbaked 9 inch pastry shell
  • 1 cup brown sugar
  • 3 large eggs
  • 1/2 cup heavy cream
  • 1/3 cup pure dark Maple Syrup
  • 1 tbsp. melted butter
  • 2 tsp flour

Unsweetened Whipped Cream

  • 1 cup of cold heavy whipping cream

Preheat oven to 350°

  1.  Whisk together the sugar, eggs and cream until well combined.  Whisk in the Maple Syrup, butter and flour.
  2. Pour filling into pastry shell and bake for 50 to 60 minutes.  Filling should still slightly jiggle in the center when moved.   Allow the pie to cool completely before serving.
  3. Whisk cream by hand or with a mixer until soft peaks form.  Serve the pie with the whipped cream.  Refrigerate any left over pie.

22 Comments

Filed under Pie

9 Bright and Beautiful Recipes To Make Us Happy

This.  Girl.  Is.  Ready.  For.  SPRING.

This year, even though it seems we’ve had less snow, I’ve been extra desperate for some spring sunshine and weather.  I’m usually pretty okay with lots of snow and cozying up inside, but for some reason, I’ve hit my cold limit already and I want the freezing temperatures to go away.  Like yesterday.  It might have something to do with the amount of times I’ve had to shovel lately, only for the street plow driver to go whizzing by and fill it all back in.  Doesn’t he feel guilty about that?!

After the last storm, I threw my shovel down, trudged inside the house and put an all call out to my fellow bloggers for some bright and beautiful recipes to cheer me up.   I’ve decided that since I still have to wait for spring to arrive, I’m going to bake myself happy.  And magically, as I sat down to compile this inspiring list, the sun came out again.

Spring Collage via SweetRevelations


1   Don’t these gorgeous, melt in your mouth, Raspberry Macarons via Nutmeg Disrupted cheer you up instantly?   Sweet and cheerful.

Get the recipe here.

Raspberry Macarons via Nutmeg Disrupted

2   These elegant looking Mini Wild Blueberry and Cream Cheese Trifles via SweetRevelations, are a family favourite and a breeze to make with store-bought pound cake.

Get the recipe here.

Mini Wild Blueberry Trifles via SweetRevelations

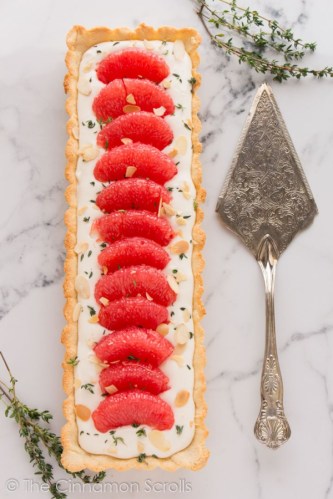
3    This Grapefruit & Thyme Mascarpone Tart via The Cinnamon Scrolls would be a stunning addition to any meal, and it’s gluten-free.  The presentation, with that ruby red grapefruit is simply beautiful.

Get the recipe here.

Grapefruit & Thyme Mascarpone Tart via The Cinnamon Scrolls

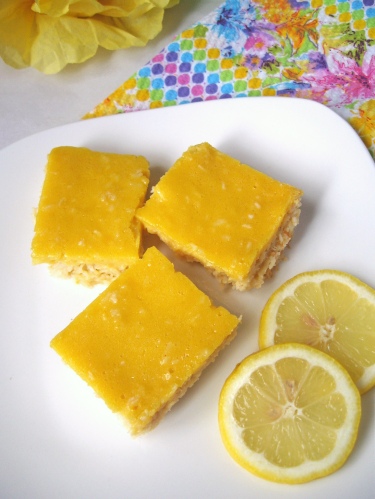
4   These Mango Lemon Bars with Coconut Crust via Swirls and Spice, are definitely a mood enhancer!  They just look sun-kissed and tropical.  I’m feeling warmer already.

Get the recipe here.

lemonbars via Swirls and Spice

5   Not only did the photo of these Raspberry Coconut Linzer Bars via The Brunette Baker make me want to reach through my computer screen, but the post itself is hilarious and had me laughing my frost-bitten toes off.

Get the recipe here.

Raspberry Coconut Linzer Bars via The Brunette Baker

6   This Springing Out Candy Bark via My Wife’s Muffin, just screams spring and happiness.  My inner child is delighted with the colours, textures and flavours here.  Happy, happy, happy.

Get the recipe here.

Candy Bark via My Wife's Muffin

7   These Chocolate Quinoa Cupcakes via Flavour and Savour, are on my list to bake this week.  They’re gluten and dairy free and full of chocolate love.  Those bright yellow polka dot liners make me so happy, I might even give the plow driver one.

Get the recipe here.

Chocolate-Quinoa-Cupcakes via Flavour and Savour

8   As Samantha from My Kitchen Love says, these Grapefruit Poppyseed Mini Bundt Cakes would cut through any grey day.  I’d have to agree.  I’m already dreaming about that grapefruit glaze.

Get the recipe here.

Grapefruit Poppyseed Mini Bundts via My Kitchen Love

9   How fun are these Cotton Candy Cupcakes via My Dish Is Bomb?! Get the kids in the kitchen and have fun creating with these.  I’m smiling ear to ear!

Get the recipe here.

Cotton Candy Cupcakes via My Dish Is Bomb

And there you have it!  Nine bright and beautiful recipes to make us happy and remind us that spring is indeed coming.  Watch out for part two of my recipe round-up, I can’t wait to share them all with you!

Renee

xo

16 Comments

Filed under Recipe Round-up

Flourless Meyer Lemon Meringue Cake

Guys, I’m really feeling sun deprived.  We’ve had some cold, damp, icy weather these days.  Followed by more snow.  And more rain.  And bone chilling cold.  You get the idea.  I’m eagerly awaiting the arrival of spring.  Desperate for it in fact!  I’ve decided that since it isn’t coming fast enough, I’m going to start welcoming spring in early myself!  So I’ve been posting all things sunny and bright on my Facebook page, and pouring over springtime posts from blogs that I follow, and scouring Instagram for some energizing inspiration.  I’ve even been literally stocking up on cheerful, sun-kissed things for the house.  I’ve got some serious colour cravings happening.

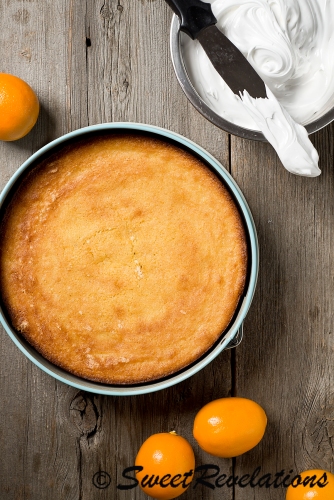
Flourless Meyer Lemon Meringue Cake via SweetRevelations

All the more reason to bake this outstanding Flourless Meyer Lemon Meringue Cake.  You might say I’ve gone a bit overboard with Meyer lemon purchases lately, but their bright golden yellow colour just screams happiness to me.   They’re tart and definitely sweeter than a regular lemon, and they have an almost exotic floral scent.  I knew that I would be using some to make a flourless lemon cake, as I’ve always been completely smitten with Nigella Lawson’s Clementine Cake.  The idea is similar, in that the whole fruit is included in the recipe.  That means the whole Meyer lemon is pureed right into the cake.  Four of them in fact.

Well, that’s a lot of happiness in there if you ask me.

lemon cake 1

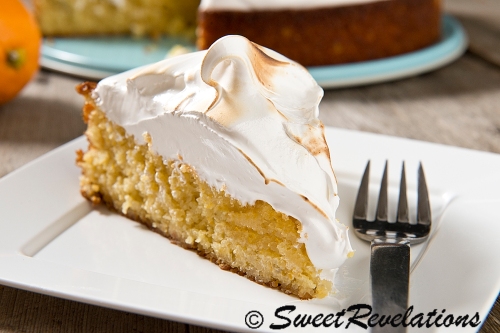
The best news here friends, is that this cake simply gets better with age.  It’s incredibly moist and bakes up as if it’s been drizzled with a lemony syrup or something.   You can top it with a dreamy meringue, like I’ve done here, or you can serve it with a simple dusting of powdered sugar or a lemon glaze at tea time, all  are just as good.  Either way, the cake is a snap to make, and the lemon flavour is like a sweet kiss from the sun.  Your friends will never believe that it doesn’t contain any flour what-so-ever.

Flourless Meyer Lemon Meringue Cake via SweetRevelations

Honest to goodness, as I was baking this the other night (for the second time in a week!), the sun came out for just a brief moment.  It was shining so brightly through my kitchen window that I couldn’t help but feel like Mother Nature was hearing my plea.  It felt, for just a few minutes, that spring might soon be on its way.

I hope the sun is shining bright wherever you are!

Renee

xo

Flourless Lemon Meringue Cake

  • 5 Meyer Lemons
  • 4 eggs
  • 1 1/2 cups of sugar
  • 3 cups almond meal
  • 1/4 tsp salt
  • 1 1/4 tsp baking powder

Meringue Topping:

  • 6 egg whites
  • 2 cups of sugar

Preheat oven to 350° and spray a 9 inch springform pan with non stick spray and line the bottom with parchment.

  1.  Mix the almond meal, salt and baking powder in a small bowl and set aside.  Place 4 of the lemons in a pot and cover with cold water.  Bring water to a boil and continue boiling the lemons for 25 minutes.  Remove from the water and set aside until cool enough to handle.  Once cool, cut the lemons in half, remove the seeds and puree the whole lemons until smooth.  You will need 1 cup of puree.  Set aside.
  2. Zest the remaining lemon and place in a medium bowl with the sugar.  Using your fingers, rub the zest into the sugar.  Add the eggs and beat for at least 5 minutes until mixture is pale and increased in volume.  Slowly add the almond meal and mix just until combined.  Pour into prepared springform pan and bake for 45-55 minutes, until center is slightly springy when touched.  Allow cake to fully cool.  Remove from pan and place on serving platter.
  3. For the meringue, you will need a stand mixer.  Fill a saucepan (large enough to fit your mixing bowl just a few inches) with a few inches of water.  Bring the water to a boil, then reduce heat to med-low so water continues to simmer.  In your stand mixer bowl, hand whisk the egg whites and sugar just until combined.  Place over simmering pot and whisk for approx 4 mins until the egg whites are hot (about 150 degrees).  The sugar should be dissolved by this time as well.  Place bowl on stand mixer and attach the whisk attachment.  Whisk on medium until whites have increased in volume and the outside of the bowl is just slightly warm to the touch.  Use immediately to ice the cake.  Use a kitchen torch to toast the meringue.  The cake will keep well in the refrigerator for a few days.  Enjoy!


12 Comments

Filed under Breakfast, Cake

Heart-Shaped Sprinkle Cookies

Oh it’s soon to be Valentine’s Day!  The day devoted to showing our love for each other, through sweet cards and kisses, flowers and chocolate.  I for one, have been dropping hints about my favorite chocolate all week long.

Heart Sprinkle Cookies via SweetRevelations

It just wouldn’t be Valentine’s around here if these Heart-Shaped Sprinkle Cookies didn’t make an appearance.  They’ve been a Valentine’s tradition in our family since I was a wee one myself.  They always arrived in our lunch boxes during Valentine’s week and mom usually sent enough along for the whole class.   I can’t really think of a time that she missed it, even as we entered high school and college.  As a matter of fact, they still made an appearance when I was newly married with young children at home.  That’s mom though, still baking those sweet, sprinkle specked childhood favourites, even when we’re all grown up.

Do you see how my love of baking and passing on these sweet traditions for my own family got started?  I mean, doesn’t that just say love right there?!   It’s these little things, like simple cookie traditions that are the real gifts during special holidays.   Because what mom gave to us, essentially, was her time.   Each year, without fail, the way she made things in the kitchen for us communicated her love for us.  And now, when we share them with our own children, we get to feel all those good feelings all over again.   And isn’t that better than a box of chocolates?

Heart-Shaped Sprinkle Cookie via SweetRevelations

These are a very simple buttery, tender sugar cookie recipe, with the addition of some lemon extract, and colourful sprinkles.  The ingredient list is fairly basic, which means you probably have everything you need to make a batch today!   As baking recipes seem to become more complicated these days, I’m reminiscing about all of the simple, and sweet, recipes of generations past.   I often like to add my own flair to recipes that have been passed on to me, but for this time, I think simple is best, and I’m leaving moms just as they should be.    Sometimes less is more, you know?

heart cookies 1

It’s always great to give people a special treat for Valentine’s Day, but even better when you put your time and love into it.   And maybe a few sprinkles.  Get the kids into the kitchen this week-end and start your own baking story.

Happy Valentine’s Day!

Renee

xo


Heart Shaped Sprinkle Cookies

Makes 5 dozen cookies

  • 1 cup unsalted butter, room temperature
  • 2/3 cup sugar
  • 1 egg
  • 1 1/2 tsp lemon extract
  • 2 3/4 cups all-purpose flour, sifted
  • 1/2 tsp baking powder
  • 1/4 tsp salt
  • 4 tbsp sprinkles

Preheat oven to 375°

  1.  Combine the flour, baking powder and salt in a small bowl, set aside.  Cream together the butter and sugar until light and fluffy.  Beat in the egg and lemon extract.  Mix in the flour mixture just until combined.  Barely mix in the sprinkles.  Wrap and chill the dough for 1/2 hour.
  2.  On a lightly floured surface, roll out the dough to a 1/4 inch thickness.  Cut heart shapes with a 3 inch heart cutter and place on a parchment lined cookie sheet.  Bake for 7-8 minutes.   Store cooled cookies in an airtight container.  Cookies can be made ahead and freeze very well.


18 Comments

Filed under Cookies

Delicious Ways To Enjoy Homemade Yogurt

Homemade Yogurt via SweetRevelations

Remember a while back, I shared with you my recipe for DIY Homemade Yogurt?  I couldn’t believe then, how simple the process was, and how much I loved the idea of making this creamy, tangy staple for my family.  I’ve pretty much got the process down to a fine science now, making it faithfully every Sunday evening before bed, and waking up to the magic of fermentation each Monday morning.  If you’re making it too, you might find that you end up with more yogurt than you know what to do with, so I’m sharing with you some of the ways we enjoy this 2 ingredient gem.

1. For Breakfast

Use it in smoothies or smoothie bowls, with overnight oats, or on its own with nuts and honey or a swirl of jam.  Figs, honey and pistachios are my current morning favourite.   If you process your yogurt in small jars, breakfast to go is made even easier.

yogurt

2.  Frozen Yogurt

One of my most loved uses for extra yogurt.  There are endless options for Homemade Frozen Yogurt that don’t require an ice cream maker and you get the added pleasure of knowing exactly what ingredients are in there.  Here’s one of our summertime, or anytime, favourites.  Peanut Butter Chocolate Chunk Frozen Yogurt.  You’re welcome.

Peanut Butter Frozen Yogurt via SweetRevelations

3.  Cakes and Breads

If you’ve made and drained homemade yogurt, the remaining whey (the leftover liquid) can be used instead of water in bread making recipes.  Yogurt is also an easy substitution, cup for cup, for sour cream in most cake recipes.  This Blueberry Buckle Coffee Cake from King Arthur Flour, is one of our family favourites (I use 1/2 cup of yogurt and 1/4 cup milk in the batter).

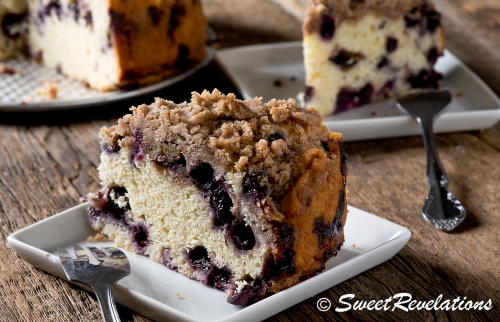
Blueberry Coffee Cake made with Homemade Yogurt via SweetRevelations

4.  Yogurt Cheese {Labneh}

When you drain yogurt overnight or for several hours, the result is yogurt cheese.  It’s thick and tangy and has almost the consistency of cream cheese.  You can add fresh herbs and seasonings to flavor this easy spreadable cheese or eat it plain.  It’s delectable when spread on Rye Crisps with apple slices and pumpkin seeds (a drizzle of honey is super too!).

Homemade Yogurt via SweetRevelations

5.  Fast Dessert

Did dinner company arrive at the last minute?   You can throw together a super quick Eton Mess in no time flat.  Mix some thickened homemade yogurt with macerated strawberries (or strawberry sauce) and crushed meringue nests.  Layer in a dessert glass with fresh berries and cream.

Homemade Yogurt via SweetRevelations

Now that I’m using my own yogurt I don’t think I’ll ever go back to store-bought again.  I have the comfort of knowing exactly what’s in it and I can flavor it to my own liking.   I’m curious to know, do you make your own yogurt?  Is it something you might be willing to try?

Happy baking friends,

Renee

xo

8 Comments

Filed under Breakfast, Cake, Extra Special, Ice Cream, Tutorial

Coffee Shop Worthy Date Squares

My girlfriend and I have a serious appreciation for good coffee.  We’ve visited some of the best coffee shops and cafes within our area, and talked with those who make a living roasting beans from around the world.   Undoubtedly, we settle in with a good cup of caffeinated bliss, share a pastry or two and get caught up about our busy lives.  I don’t know why, but often times I choose a date square with my coffee.  It’s something I rarely bake at home, but I love to enjoy a nice big serving when in a coffee shop.  You might say I’ve become a bit of a connoisseur about these dense, date filled, oat bars.

Date Squares via SweetRevelations

I have no idea where my love for these classic homemade bars came from.   Just thinking about them makes me think of old-school recipes that are hardly made at home anymore.  I mean, with all of the salted this and caramel that options we have these days, the date square is hardly at the top of the list for the newest generation of home bakers.  Even though they keep well, travel well, freeze well, and are fairly fuss-free, they’ve kind of disappeared from potluck menus and home kitchens.  Years ago, a sweet relative of mine used to bring them with her to pretty much every family function.  They were thick and sweet and had the best crumble on top.  She passed away a long time ago, and unfortunately her recipe was never passed on.  Since then, I’ve been on a quest to find the perfect one.  As a result, I’m often comparing the servings I’ve had from one coffee shop to the next.  Too dense, too crumbly, too thin, too sweet.

Date Square via SweetRevelations

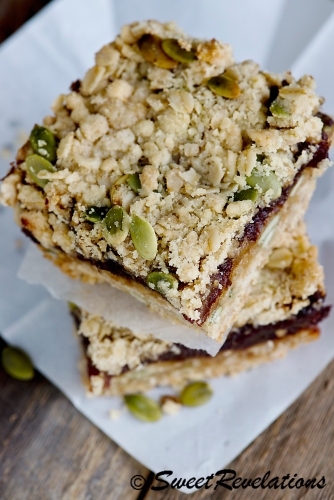
This week-end, after another coffee shop visit, I decided to make my own.  I already knew what some of my requirements would be.  A thick bottom layer is a must, with a slightly sweet date filling, and a golden crumbly oat top.  Classic date square recipes require that you boil the chopped dates for a few minutes in water, to soften the dates and thicken the filling.  As I was pitting and chopping the dates, I had an epiphany!  Instead of adding water to my date filling, I brewed a cup of my favorite coffee and used that instead.   The results were just as I had hoped.  A thick filling, that was slightly sweet and only made richer tasting with the addition of coffee.  Don’t be alarmed, the coffee taste doesn’t exist at all, it just enhances the date flavor.  The buttery, crumbly topping was pretty simple, but the last-minute addition of pumpkin seeds has made these a little more, well, glamorous I’d say.

I’m voting for a date square comeback every one!

Date Squares via SweetRevelations

I must confess that these were pretty satisfying.  Coffee shop worthy in fact.  The filling to base ratio was spot on and they didn’t crumble in my hands.  And they made a hearty breakfast treat this morning (by the way, they qualify as a breakfast option on account of the fruit and oats in my books).   My friends can expect them to be making an appearance at our next pot luck!

Date Square via SweetRevelations

Have you got a family date square recipe?  I would love to hear about it!

Happy coffee shop lingering and baking friends,

Renee

xo


Date Squares

Preheat oven to 350°

Filling:

  • 2 1/2 cups Medjool dates, chopped and pitted
  • 1 cup hot black coffee
  • 1 1/2 tbsp. lemon juice
  • 1/4 cup brown sugar
  • 1/2 tsp baking soda

Base:

  • 1 1/2 cups large flake oats
  • 1 1/4 cups flour
  • 1/2 cup raw pumpkin seeds
  • 1 cup brown sugar
  • 1/4 tsp kosher salt
  • 1/2 tsp baking soda
  • 3/4 cup unsalted butter, cubed and slightly soft but still cool
  1.  Line an 8 x 8 square pan with parchment paper and set aside.  Make the filling first by combining the coffee, dates, sugar and lemon juice in a pot.  Bring to a boil.  Add the baking soda and stir mixture continuously for approx. 4 minutes, until filling is thick and dates are soft.  Set aside to cool while you prepare the base.
  2. Combine the first 6 ingredients of the base recipe in a medium-sized bowl and mix to combine.   Add the butter and use your hands or a fork to coat the flour mixture with the butter until crumbly in texture.   Press 3 1/4 cups of oat mixture into the bottom of the pan.  Spread on the layer of date filling.  Top with remaining oat mixture and press down slightly.  Bake for 30-35 minutes until topping is golden.  Cool completely before cutting and serving.


20 Comments

Filed under Bars, Breakfast