It’s hard to believe that in just a week’s time my blog will be celebrating its second birthday. It started out with just a simple love for baking and SweetRevelations has grown into so much more.
It helped to launch my dream of owning a business.
It reminded me of my love of writing and creating.
It opened the door to so many amazing experiences and friendships.
Not to mention the extra twenty pounds I’ve gained since the birth of this sweet idea.
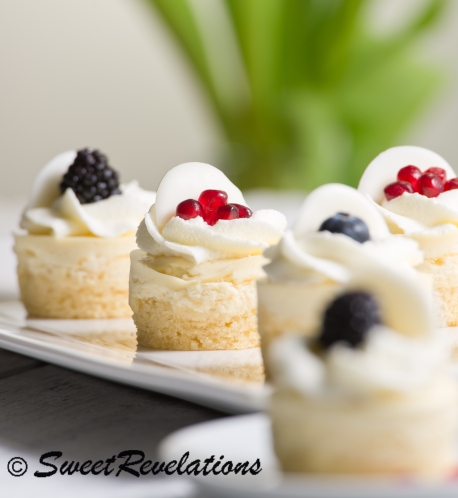
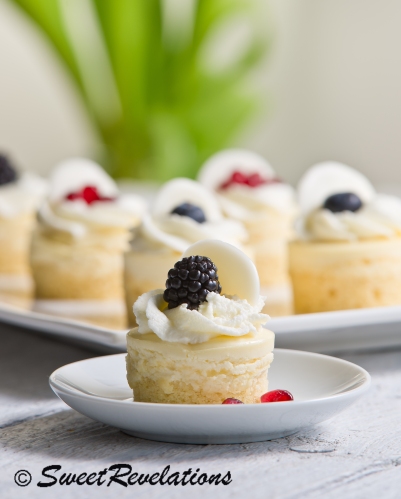
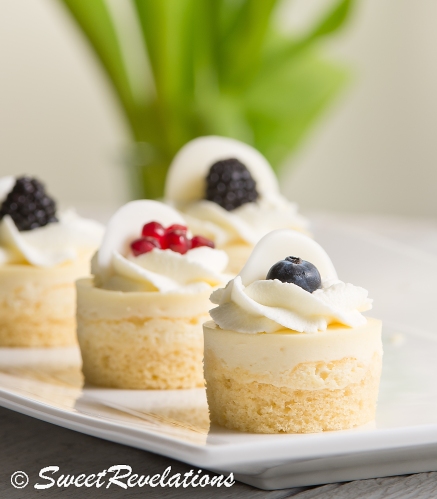
I currently have a love for desserts that are mini size. Small and decadent. Little wee bites of sweet goodness. Simple and elegant lined up on a classic white dessert platter.
These are Mini Lemon Cheesecakes that I baked on a tangy Lemon Sponge base.
I’m so grateful for all of your interest this past year. I sure do love all of your comments and e-mails. I wish you were here so I could give you a good ol’ squeeze!
Enjoy!
Lemon Sponge Base
*adapted from GoodFood.com
Makes enough for 24 mini cheesecakes
- 175 gr unsalted butter
- 175 gr sugar
- 175 gr self-rising flour
- 1 tsp baking powder
- 1 tsp pure vanilla extract
- 1 tbsp lemon zest
- 3 eggs
- 2 tbsp lemon juice
Preheat oven to 350°
1. Combine all ingredients in a large bowl and beat just until combined.
2. Place 1 tbsp in the bottom of each cavity of a mini cheesecake pan. You will have some batter leftover that will make great cupcakes! Bake the sponge bases for 10 minutes while you make the cheesecake.
Lower oven temp to 300°
Lemon Cheesecake
- 450 gr cream cheese, softened
- 1/2 cup sugar
- Pinch of kosher salt
- 1/2 tsp pure vanilla extract
- 1/2 tsp lemon juice
- 1 tsp lemon zest
- 2 large eggs, room temperature
1. In a medium-sized bowl beat the cream cheese on medium-high speed until smooth. Blend in the sugar until well incorporated. Mix in the salt, vanilla and lemon juice. Finally, beat in the eggs one at a time, mixing well and scraping down the bowl after each addition. Careful not to over mix!
2. Spoon the cheesecake mixture onto the sponge bases. I filled mine right to the top. Bake for 14 minutes. Turn the oven off and allow cheesecakes to cool in the pan in the oven.
Garnish with fresh berries and whipped cream. I also made some rose petals with melted white chocolate and used those on top.
*these cheesecakes freeze really well.


lovely! congrats on the two years!
Congratulations!
Reblogged this on veramonifa and commented:
Yuummyyyy
Wow, well done on two years blogging. These look so beautiful!
I love the assortment of berries on top. What a quick and delicious way to “personalize” dessert. Question: if you don’t have a mini cheesecake pan, will a muffin pan do? What’s the difference?
P.S. And laughed out loud about the “gained 20 lbs since starting the blog.” I would say if you didn’t gain a few, then the desserts just weren’t as good as they look in the photos… and we know that’s not true!
Ooh, I love a bit of lemon baking. Happy anniversary when it comes.
These sound so refreshing! We’re definitely on the same page, mini desserts are my fave!
These look and sound delicious and the photography is stunning!
First of all “Congratulations”!!! What an amazing journey this must be. Second…Wow! These look stunning and delicious!
Amazing and beautiful photos!
Congratulations on two years! These are so cute and look delicious, I love the presentation.
Absolutely mouth-watering! I must try these 🙂
Ah! I’m so hungry now, this looks so tasty! Your recipes are wonderful and so delicious!
Reblogged this on A girl's guide to biology and commented:
Doesn’t this dessert looks so fantastic?! Can’t wait to prepare it one day. It won’t end as wonderful as it is in the picture, (Matt will sure mock of my epic fail if I show him this pic). Wanted to share it with you!
yum this looks sooooooo good! thanks for sharing!